The Table Builder and the Table Wizard both allow you to create tables in the Rich Text Editor. The Table Wizard button displays the standard table grid icon.
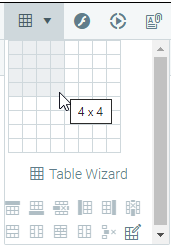
To create simple tables, position the cursor where you want to create the table and click the Insert Table button on the toolbar.
Choose the number of rows and columns you want on the grid and click to select. The table will appear in the editor.
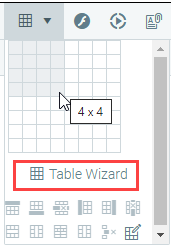
To create more complex tables, you can use the Table Wizard.
Position your cursor where you want to create the table, click the Insert Table button on the Editor toolbar, and then click the Table Wizard button underneath the grid.
The Table Wizard pop-out box will open.
To add or remove columns or rows, click [+] or [ - ] next to Columns and Rows.
Click [+] next to Column Span to merge the cell you have selected with the one to its right. Click the [-] button to unmerge the left cell.
The [ - ] or [+] buttons next to Row Span work in a similar way as Column Span, but for rows.
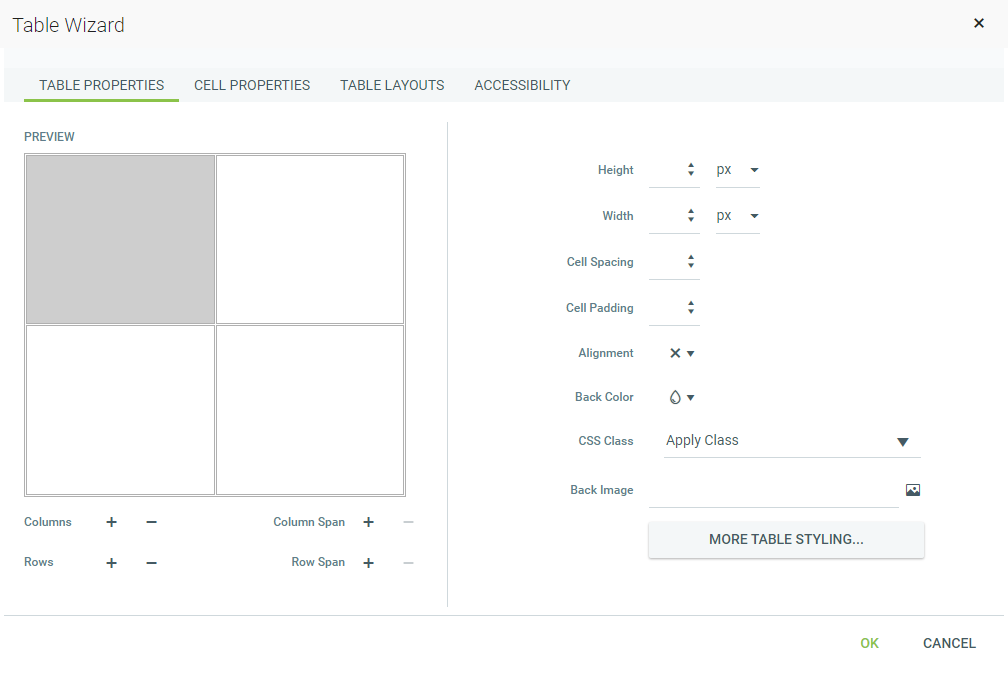
When you have finished setting up the table, click the OK button and the table will be created in the editor. Further customization of this table is possible using the Table Properties, Cell Properties, Table Layouts, and Accessibility tabs of the Table Wizard. The next few sections describe in detail how to modify tables.
The Table Properties tab allows you to fine-tune the appearance of a new or existing table.
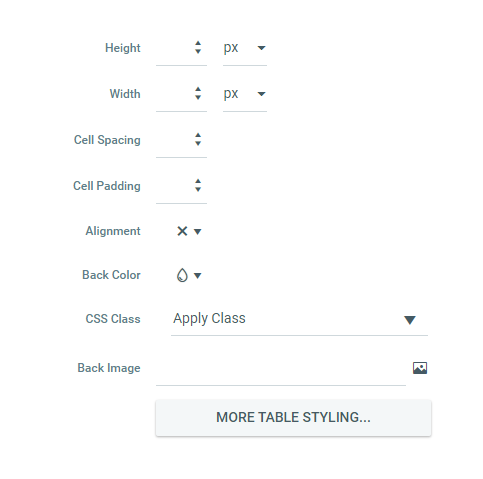
Once the Table Properties dialog tab is opened, you can set the appearance of the table. This involves setting one or more of the following table properties:
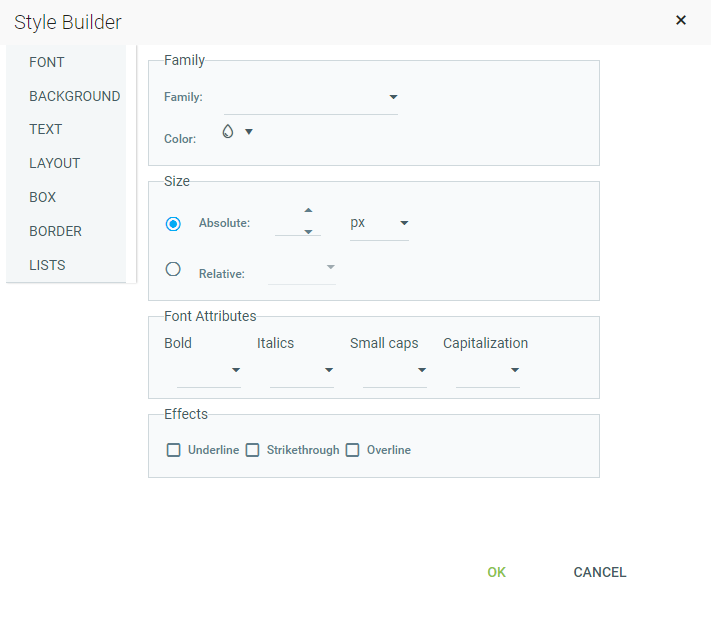
Clicking the More Table Styling Button will open the Style Builder pop-out box. This screen allows you to make more detailed changes to a table including font, background, text, layout, box, border, and lists.
The Cell Properties tab allows you to fine-tune the appearance of individual cells of a given table.
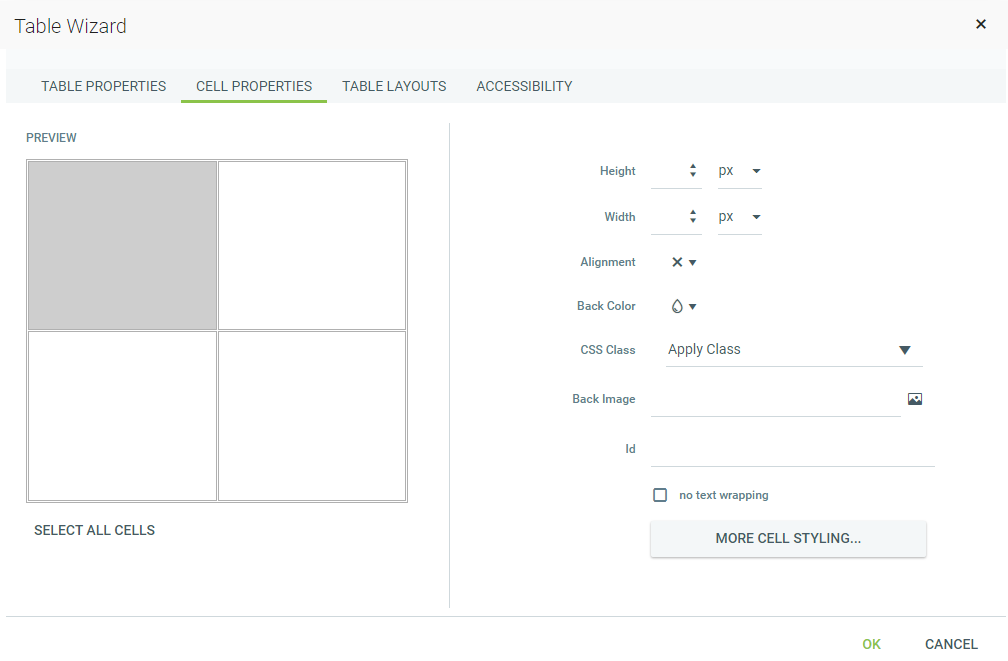
Once the Cell Properties dialog tab is opened you can set the appearance of the individual cells. This involves setting one or more of the following cell properties:
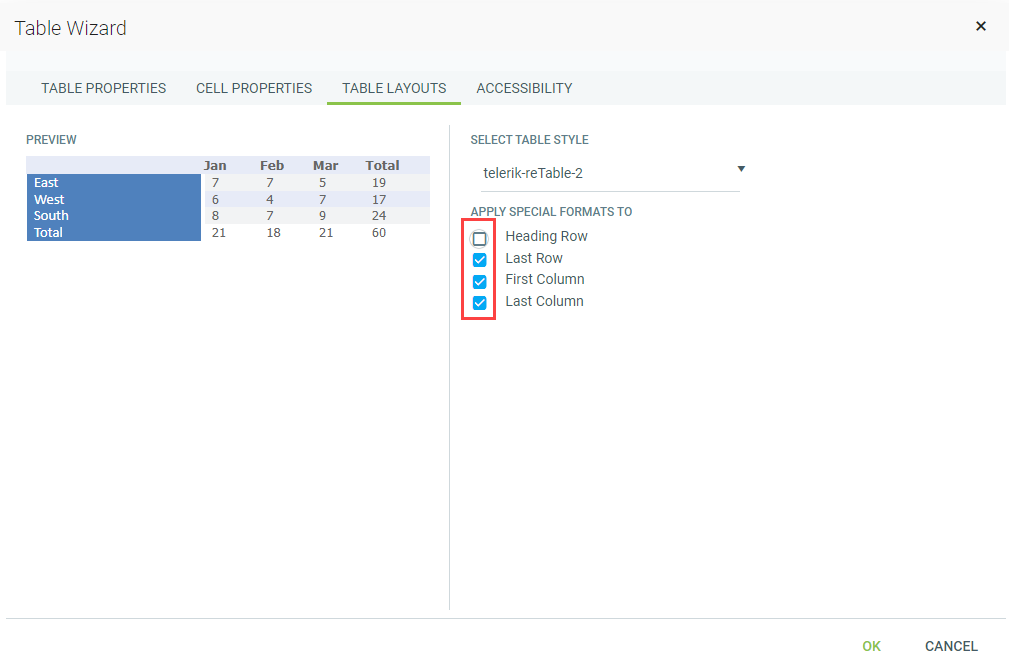
The Table Layouts tab allows you to alter the appearance of the table's layout style.
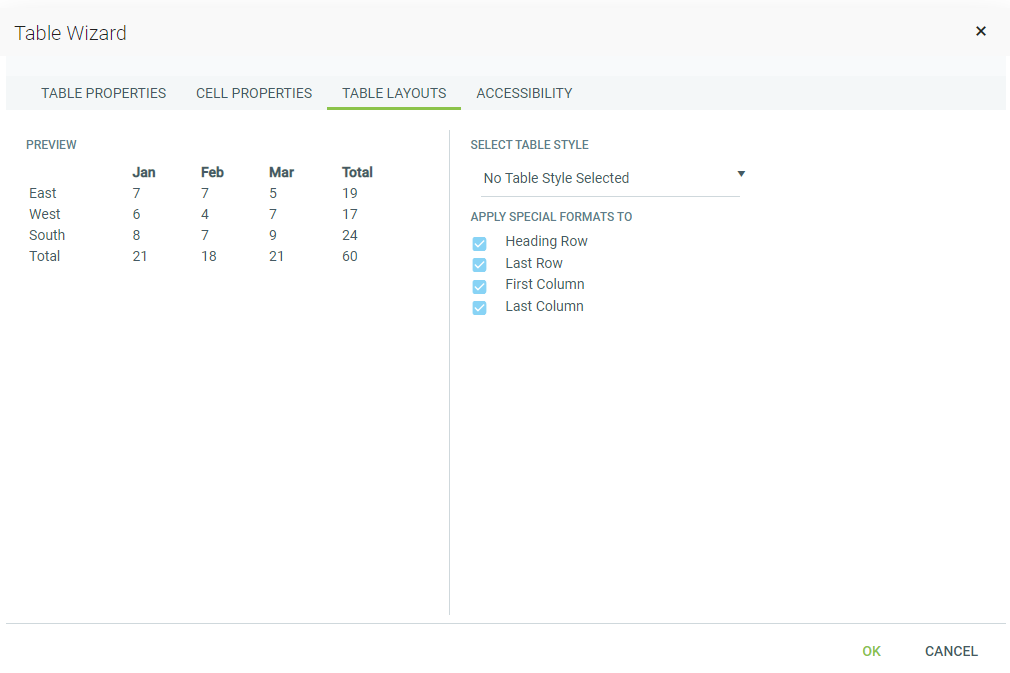
Use the Select Table Style drop-down menu to select any of the pre-defined table styles. Making a selection will display a preview of the chosen table style on the left side of the screen. If you do not wish to apply the features of the selected table style to all rows and columns of your table, uncheck the box next to the area that you do not wish the table style to be applied.
Once you have created a table, you can easily add or delete rows and columns.
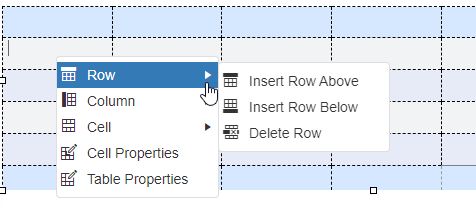
To do this, place the cursor in the row on top or beneath where you want to insert a new row. Right-click to open the context menu.
From the menu, select Row, then select to either Insert Row Above or Insert Row Below the selected cell. You can insert new columns in a similar fashion.
To delete rows or columns, simply place the cursor in the row or column and right-click. Select Row or Column, then Delete Row/Delete Column from the context menu.
Table cells can be merged or split via the context menu also.
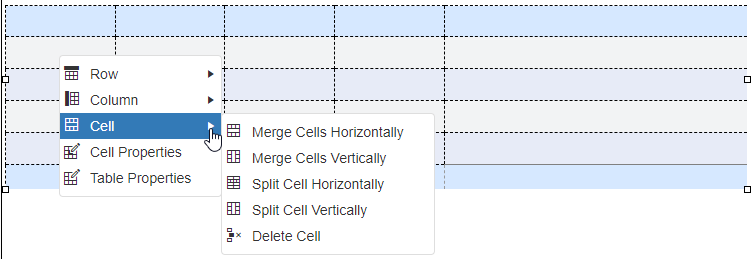
Place your cursor in the cell in question and right-click. Select whether to merge/split cells vertically or horizontally.
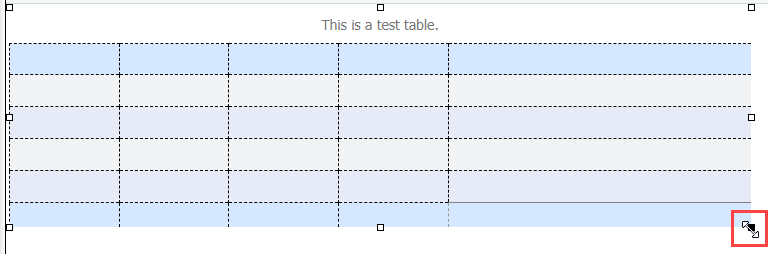
You can resize an existing table either by specifying dimensions in the Table Properties tab of the Table Wizard or by using the drag handles that appear when you click on the table to select it.
You can drag any of these handles vertically, horizontally, or diagonally to resize the table. All cells that do not have exact dimensions (specified in pixels, percent, or points) will be resized evenly to accommodate the new table size.